Tuesday, December 29, 2015

Juuzou Suzuya's Knives


Juuzou's Knives

I made mine following this video's instructions.


As a template I used the image above. It is the same template that was used in the video. The link was in the description. But I linked it down below too. Just adjust the image to the size you want it to be. 


Materials:

- Foam sheets
- Popsicle sticks
-Hot glue gun
- Black, silver, red, and gold paint
- mod podge (you can also make your own using Elmer's white glue and water)


Just so you all know I did not use some of the materials listed above. I had to come up with other alternatives on materials based on what I had at home. (I was just to cheap and lazy to buy it at the store. Besides most of the materials aren't used completely so I found no point on using a tiny bit of each.) But I do have to say it was trickier to make, but I liked the out come. I'll post the pictures below of my process.

What I actually used:
- Red nail polish
-Gold Chocolate Wrapper
-Charcoal
-Fabric Paint
-Silver Paint
-Popsicle Sticks
-Hot glue gun


Cut out your template. I suggest tracing the paper template
onto a sturdy but thin material, like that of a cereal box or the cardboard back of an old notebook.
That way your template won't bend as easily when using it to trace onto the foam sheets.

Trace your template onto the foam and cut our. I used two sheets for this.

Here you will layer the foam and popsicle sticks like shown in the video.
I made each knife with 3 sheets of foam.

Before painting them, gloss over some glue or mod podge.
That way your paint won't be absorbed to much from the foam.
I didn't have Elmer's glue or mod podge, I just used Fabric Glue.

Next you paint them. Since I did not have Black paint, I used black charcoal (the one used for art).
And because its powdery I put glue on top to keep it from going everywhere.
I was surprised that both the charcoal and Fabric glue worked just fine.
But I would highly suggest using actual black paint for the bottom.
It will be a lot easier to paint the sides. (And a lot less messier).
Here's what it looks like up close after painting them.


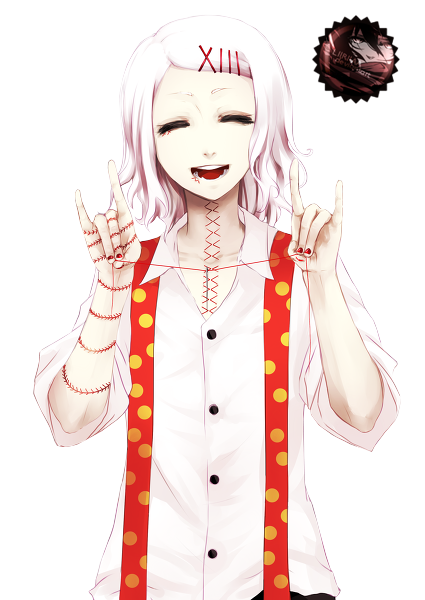
And here is the final result!
For the gold part I didn't have gold paint so I used a chocolate wrapper instead.
And for the small red part I used red nail polish.


 And yeah that's what I used and I'm happy how they turned out!

Sunday, December 27, 2015

Juuzou Suzuya's Suspenders


(Images above do not belong to me. Credit to rightful owners)


Just so you know...

I do have to warn you, making Y shaped suspenders is tricky to make. Making the X shaped one is a lot easier AND there are tons of videos on how to make them. I could not find any videos on how to make the Y shaped suspenders. Also, it would be MUCH easier to buy Y shaped suspenders and adjust them to your liking. But if you are stubborn like me and want to make them yourselves then this may help. However, I made mine in the way I wanted to (so really weirdly) and took little pictures of my process. It was more of a trial and error type of thing, so the steps are going to be confusing. I will also warn you I have only been making cosplay for 2 years now but my skills are not that great. But hopefully it inspires you or you find a better way of making them with this.

You have been warned.


Things that you will need:

- 3 Suspender clips. One pack has 2 so you will need another pack. Each pack cost $2.99 USD at Joann Fabric Store.

- 2 buckles. Each cost $2.99 at Joann's.


- Ribbon of desired color.  I decided to go with the red with white polka dots since I already had the ribbon. You can do the blue one like he wears in the anime. I used about 45 inches of ribbon for each side. But you may need to adjust it to your height. I am about 5'1.


Steps

Step 0:
- Depending on the width of the ribbon you may need to fold and sew the sides inward to fit nicely through the buckles.

Okay, I am terrible at explaining this part, So I found a video on what to do to each strap for the suspenders. Its essentially the same thing I did.


( 0:19 - 1:50 ) < Those are steps that will definitely help. When he says add in the "d-strap" just add in the clip. Same goes for when he says "add the YKK clip" just add the other clip at the end.


<    So... Something like that.


BUT WAIT. Since you only have 3 clips (two for the front and one for the back), you will only add the last clip for the back to ONE of the straps.

Then you will be joining the two straps together to share the same clip for the back.


To get the Y shape, what I did was sew straps together in a way that the two straps would spilt mid-back. (I know confusing. I'm not sorry I did warn you at the beginning.)

Maybe these images will help you understand...?
This is how they turned out. To get the Y shape I sewed both straps towards the bottom. 


I sewed them up 7 inched from the  back buckle. That way it reached my mid-back.


Okay so I realized after I uploaded that the picture is dark so its going to be hard to see, but at the top you may see a line on the left side of the suspenders, that is where you want to sew across.
Make sure to sew the sides together. Sew in a rectangle shape. That will keep both straps together.


Congratulations!! 

You made it to the end of this part of the blog. This is just how I made my suspenders and I liked how they turned out. But again its really hard for me to explain my process so sorry if it was really confusing.  Anyway, you must be confused as heck, but fear not for I have linked below placed where you can buy Y shaped suspenders instead!!

Here you go:

http://www.amazon.com/Vesuvio-Napoli-Y-Back-Convertible-Suspenders/dp/B00OQYKHUE


Thursday, November 26, 2015

Juuzou Suzuya's Hair Clips


For Juuzou's hair clips you will need five long hair pins.


Step 1: Buying the pins. I bought these for $2.49 USD. These ones were perfect because the top part of the pin was not bumpy like the smaller kinds. The flat top was easier for painting which I will do in the next step. 


They are approximately 6.5 cm long compared to the normal ones.

Step: 2 The next thing you will do is paint them white. You can do this with acrylic paint. Or you can paint them with white nail polish which is what I did. Since Juuzou's pins are red, we want them to be noticeable. So by putting a white base the red will show up more.

When painting them, be sure there is a piece of paper in between the clip. That way clip won't close shut to itself.
Step 3: After the pins dried, paint them with red. What I did was paint them with red nail polish. Since thats what I had available.

You can choose to paint both sides or just one. Its up to you.


Afterwards, be sure its completely dry before wearing, and you should be done!


Juuzou Suzuya Wig


For Juuzou's hair I bought this wig on amazon which was sold by Epic Cosplay. When I tried on the wig it was the perfect size for my head, since I do have a bigger head. The hair was really soft and you can tell it won't tangle easily. It was a bit long from the front but nothing a small trim won't fix! Overall, I'm very satisfied with the wig. :D